DIY Vintage Luggage Chair

/
0 Comments
Hi Friends,
Today is the day! It feels like I’m going to burst so here it goes:

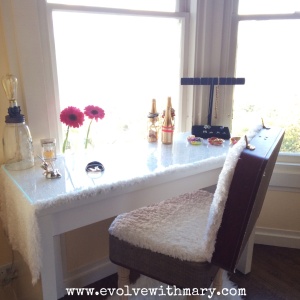
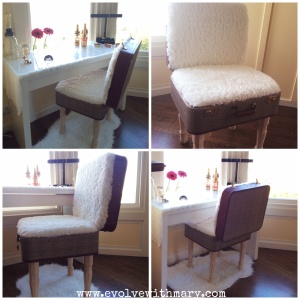
MY “SPACE JUST FOR ME”

 DO YOU LOVE IT? I DO!!! I CREATED A JEWELRY VANITY THAT I WILL ALSO USE AS A DESK. I HID MY PLANS FROM TONY SO HE WAS SURPRISED WHEN HE CAME HOME AND SAW WHAT I CREATED. THANK GOD HE LOVED IT. 

 
Processed with Moldiv 

Dressing Table - $150  purchased at ikea
DIY Suitcase chair - $110
Bracelet holders -$10
Jewelry cups - $20
 
I spent $290 on everything
I should have repurposed an old desk that would have shaved the total price in half but I didn’t have the time or energy to do that.
 
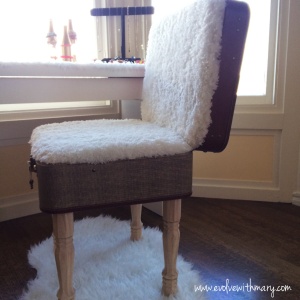
The highlight is my vintage suitcase chair. I ran across a gallery of vintage chairs here and knew I could make it. The only thing I was worried about was upholstering. Since I’ve never done it and my sewing skills aren’t the best I didn’t know how it would turn out. Putting the chair together was no problem, it was done within 20 minutes. I had to make a special trip to Joann fabrics to purchased a fluffy fabric, my original fabric was too thin, you could see the green foam and it looked sloppy and loose. The fluffy fabric was super forgiving and matched perfectly with my furry rug. I even had some left over to line my desk.
 

VINTAGE SUITCASE CHAIR

Processed with Moldiv 

Skill: Intermediate
Cost: $100 or less depending on how much you spend on your vintage suitcase
Time: 20 minutes 
 
Materials
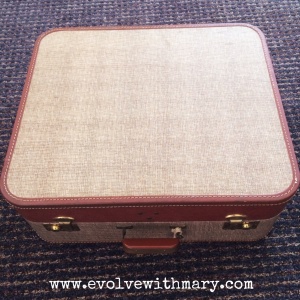
Vintage suitcase - thrift store - $30
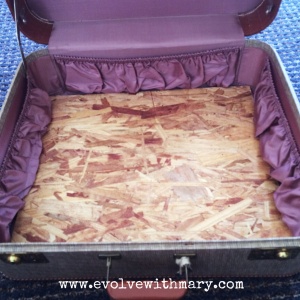
Piece of wood that fits inside of suitcase - home depot - FREE
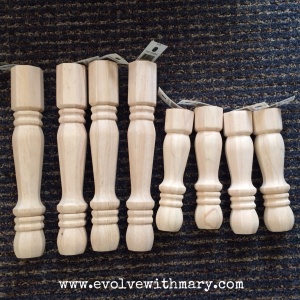
4 chair/stool legs and leg attachment hardware - home depot - $20
Power drill 
4-5 foam squares - $8.99 each
Fluffy fabric - Joanne’s fabric - $18
 
Directions:
Processed with Moldiv
Search for a vintage suitcase in good condition
I was lucky enough to find 3 reasonably price suitcases at the first thrift store I went to. I told the employees what I was doing and talked them into giving me the suitcase for $30 it was originally $50 
Most thrift stores aren’t moving much merchandise so they are usually up to making a deals 
Processed with Moldiv 
Once you get your suitcase take it with you to home depot or a hardware store
Purchase a piece of wood that fits into your suitcase almost perfectly.
I found a guy that was eager to help me. I think he had a crush on me. He spent 20 minutes making sure the wood fit perfectly, then he didn’t even charge me for it, he said it was scrap wood! 
 Processed with Moldiv
This is also where I found the legs for my chair, there were 2 sizes and i didn’t want to make an extra trip so I purchased both, the longer legs worked better for this project 
I plan on using the shorter legs for another craft in the near future
**Make sure to remove any unneeded hardware attached to your suitcase
 
You can paint, stain, or draw on your legs, I decided to leave them just as I purchased them
**Make sure to buy the leg attachments it should be a silver triangle and a few screws - this is very easy to forget, I actually forgot and remember once I was in line
 
Processed with Moldiv
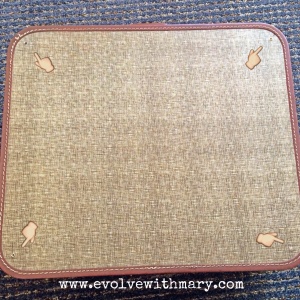
Map out where you are going to place the legs, make sure it lines up with the wood
I placed my legs 1.5 inches from the frame of the suitcase 
 
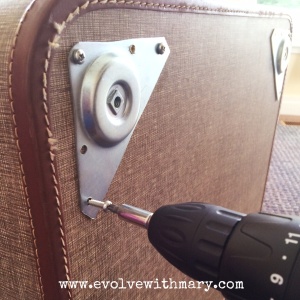
Without the wood in suitcase drill 1 hole into leg hardware and suitcase
Remove the hardware, you will be left with a hole, this makes it easier when drilling through the wood
 
Processed with Moldiv
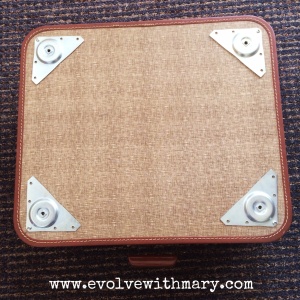
Sit the suitcase up, place wood in, and hold it with left hand, use right hand to attach leg hardware to suitcase drill through the wood
As soon as you get the first screws in you shouldn’t have to hold the wood anymore
 Processed with Moldiv
Attach all hardware and screw in your legs to make sure your happy with the positioning
 Processed with Moldiv

Processed with Moldiv
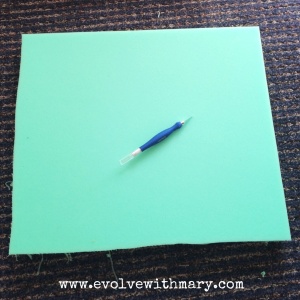
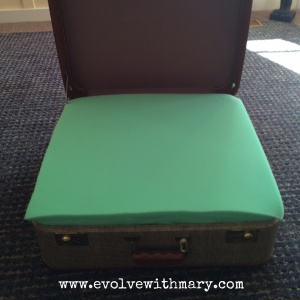
Measure and cut foam so it fits snugly into the suitcase
I cut mine about 2 inches too big
I used 3 on the bottom and 2 on the top
I plan on adding another foam cushion at a later date to make it softer

 Processed with Moldiv
This is my first attempt, the fabric was too thin and it made the chair look cheap 
Fluffy fabric is a lot more forgiving

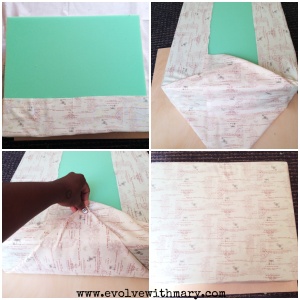
Carefully cut your fabric making sure it will fit into the chair
Make it about 4 inches large width and length(wise) so you can firmly tuck in the sides
Stuff fabric between the foam and suitcase
Keep playing with the fabric until your happy with it
Now sit down and enjoy your chair
 
The first thing my boyfriend did was try to see how far back he could lean in the chair, I freaked out and we both realized it wasn’t that kind of chair. Nothing broke or popped it is just luggage and vintage luggage at that.
 Processed with Moldiv
Sit back and enjoy your repurposed vintage luggage chair.
 
Tomorrow I’m sharing my bracelet holders. They only took 20 minutes to make and they are super cute.
 
Peace & Love,
Mary


You may also like

No comments:

About

My name is Mary! I was obese for most of my life, around 7 years ago I decided to take control of my life and successfully lost over 150 pounds. But that's just the beginning of my journey. Join me as I evolve into the person I was born to become. I love to cook, craft, read, and make people smile. I'm happy you've stumbled on by. Let’s Evolve Together.

Contact Form

Name

Email *

Message *